- Afternoon Tea, Coffee Shop, Lifestyle, Making Tea at Home, Pawfectella Everything!, Tea, Tea Reviews, Uncategorized
The Mochi Kit | Paragon Tea Room | Tea-Infused Mochi
Hello everyone! I hope this blog post finds you and your loved ones safe, healthy and well, during this time. <3
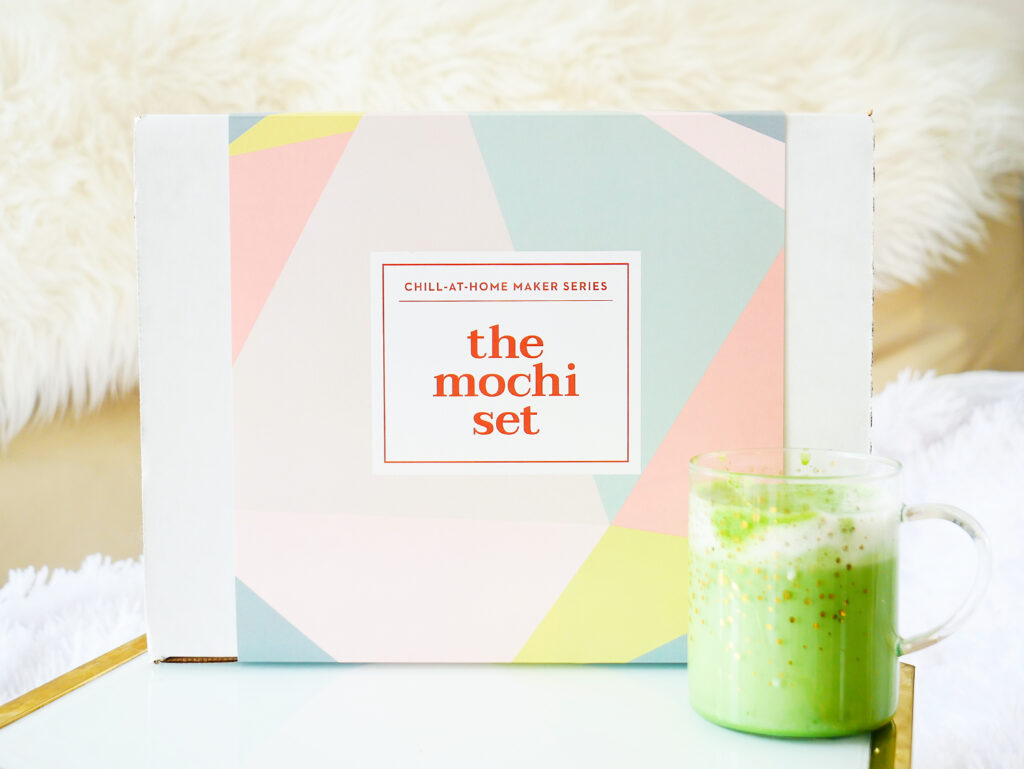
#BlackLivesMatter | To learn more, click HERE.In today’s blog post, I am sharing my experience of making tea-infused mochi! Mochi is a delicious treat that pairs well with a cup of tea. When I saw that Paragon Tea Room came out with The Mochi Set, I couldn’t resist purchasing one and testing it out. I am not a big baker though, so I was a bit nervous. Michelle, the owner of Paragon Tea Room assured me that the recipe (included in the set) was “dummy proof” and making mochi is surprisingly easy!
Last Saturday, I decided to to put my baking skills to the test and use The Mochi Set (you might have seen my Instagram stories of the experience)! If you would like to see a closer look at how my experience went, make sure to grab a cup of tea and let’s get started!

What is Mochi?
Mochi is a Japanese rice cake made of glutinous rice, water, sugar and cornstarch. Mochi is typically flavoured with green tea and/or filled with a sweetened bean paste. This makes it a delicious vegan and gluten free treat.
What does Mochi taste like?
Mochi has a dough-like texture and makes me think of a gummy candy/marshmallow type dessert. It has a starch after-taste.
If you have had mochi before, how would you describe the taste?The Mochi Set | Paragon Tea
Your mochi dream comes true! This set is inspired by all of your creativity! In this set, you will be introduced to making your own TEA-INFUSED mochi with a side of tea dip at home.
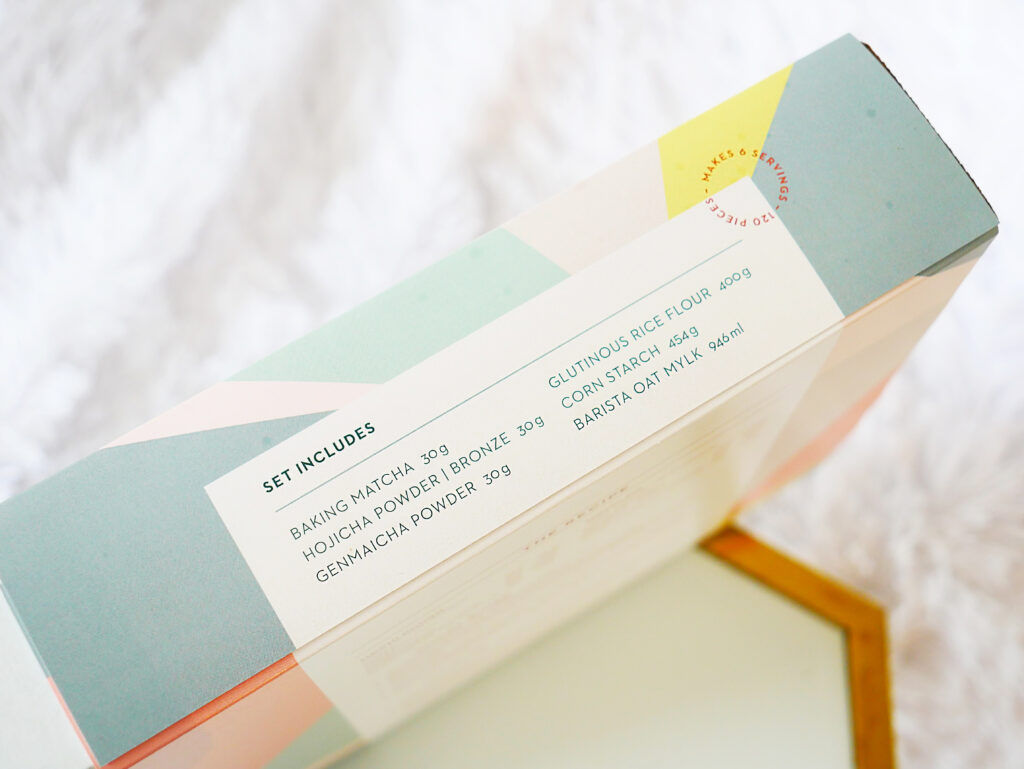
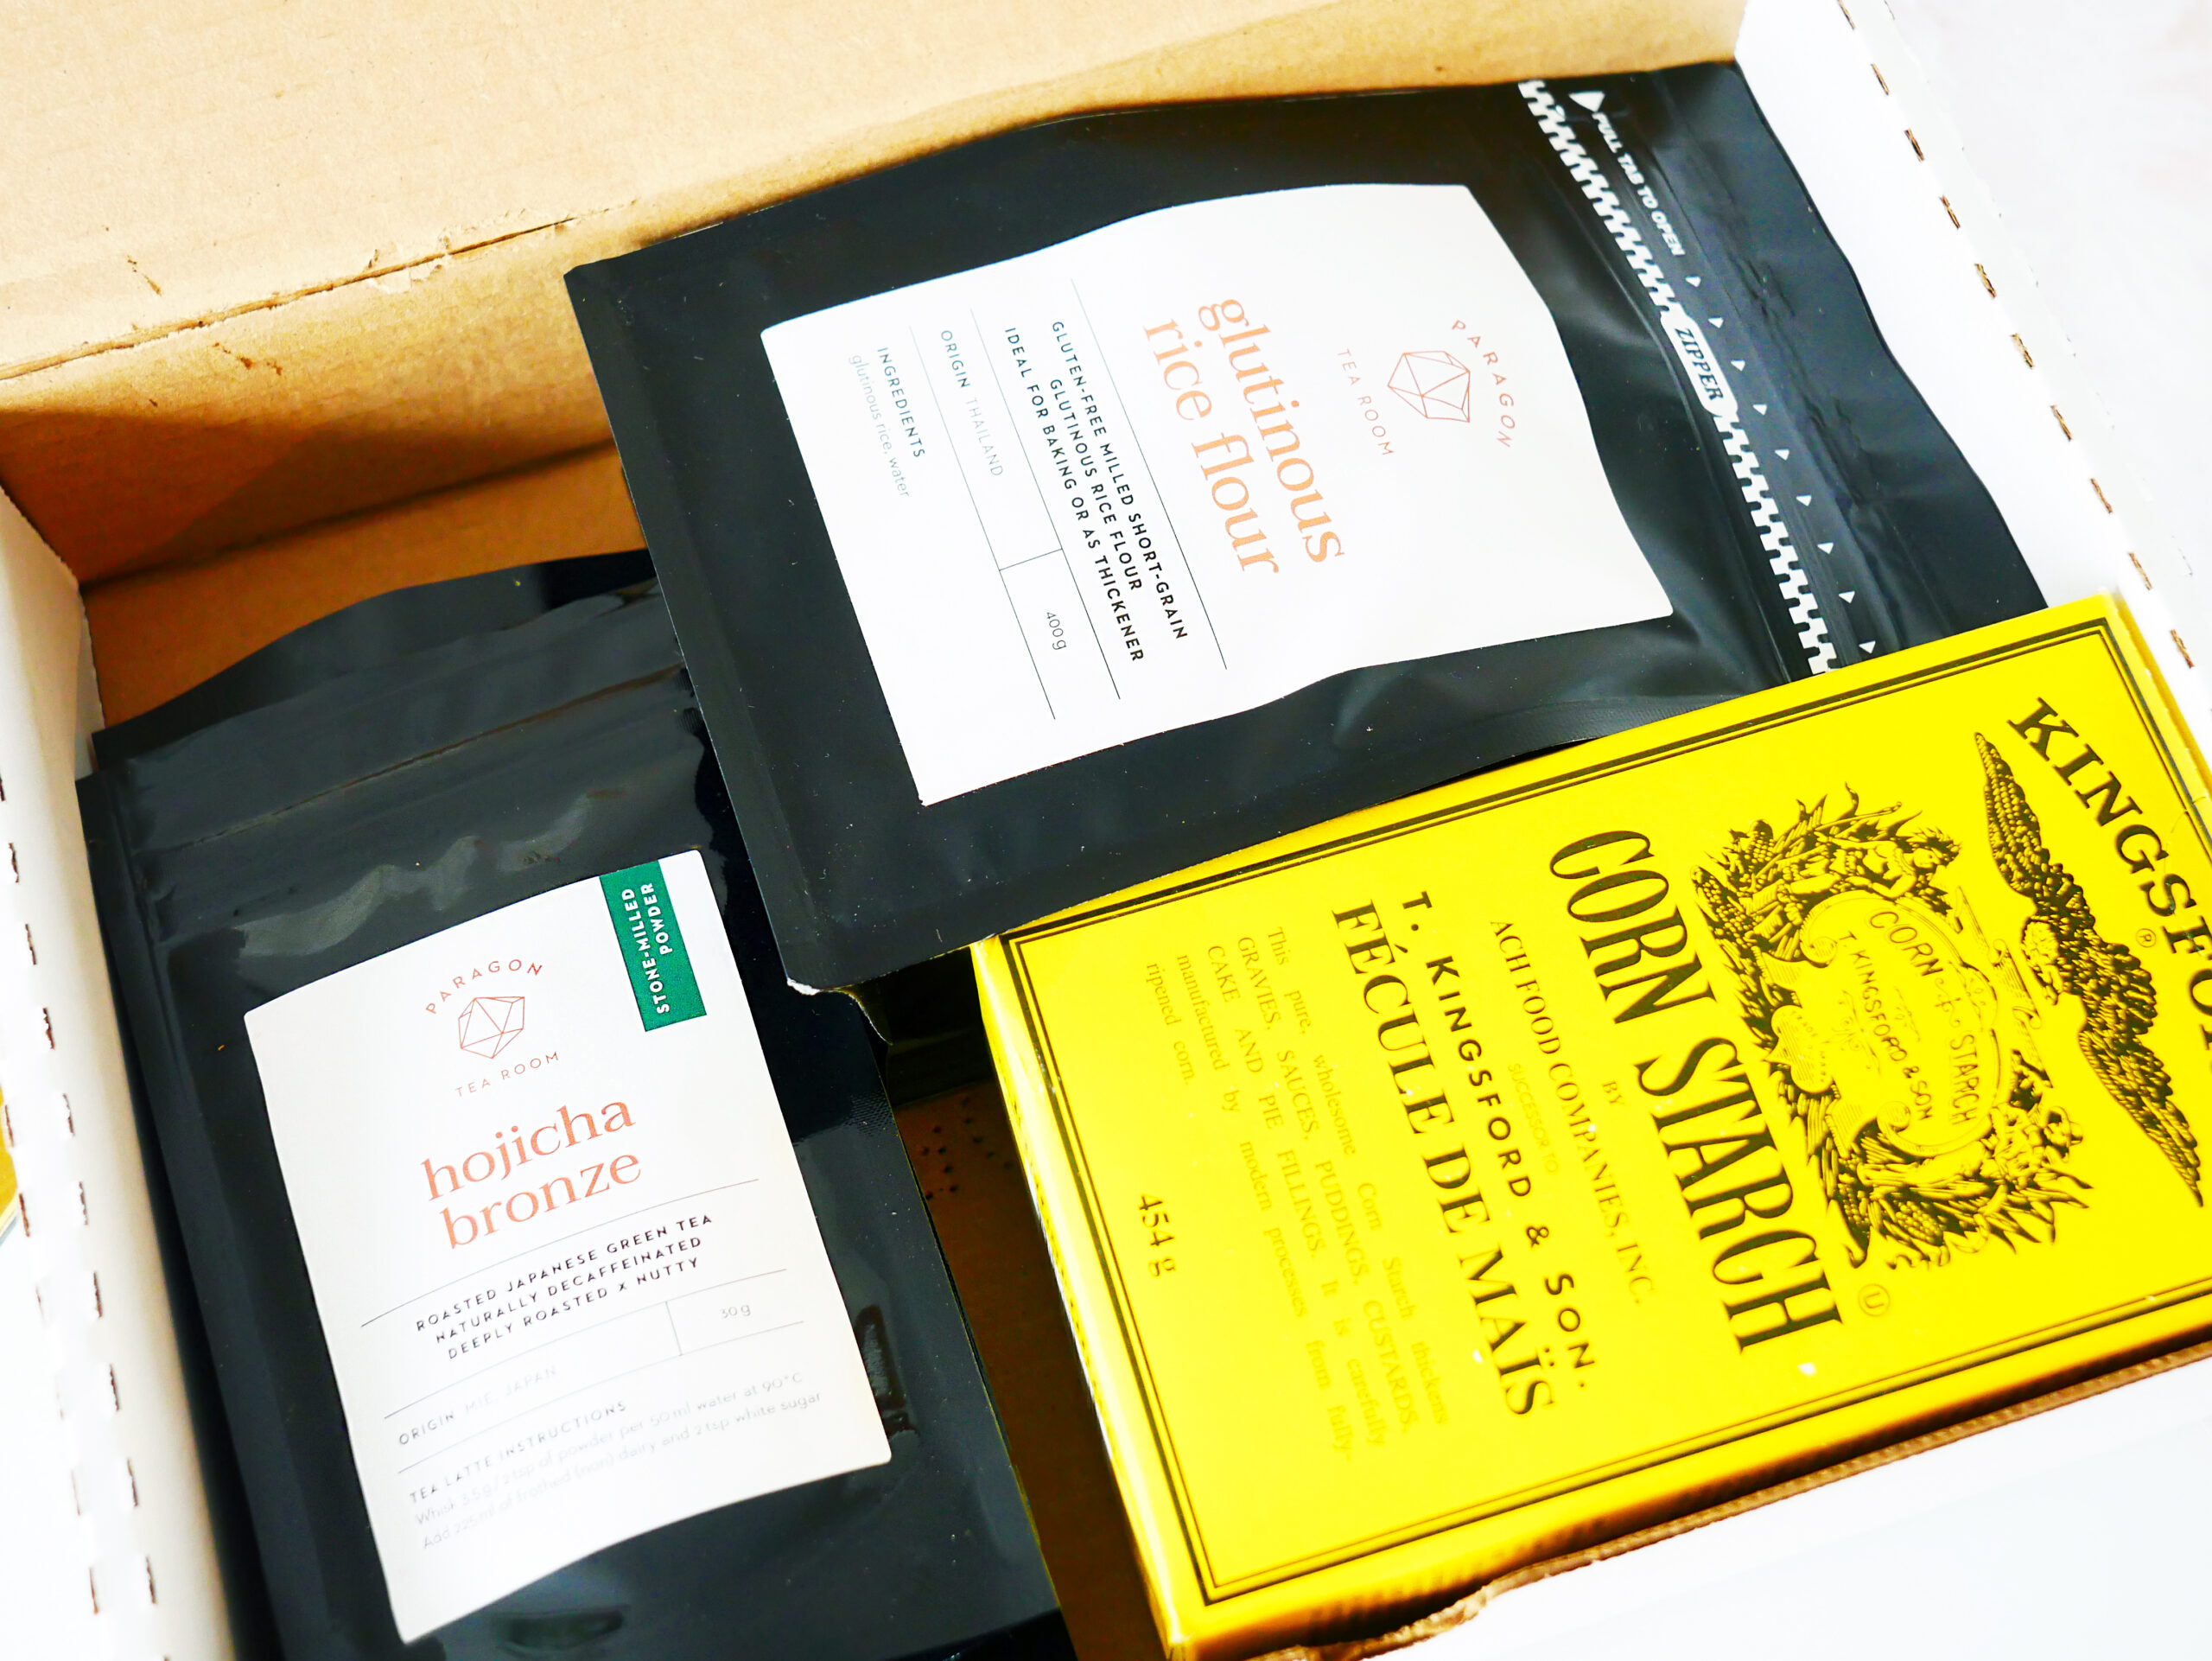
– Paragon Tea RoomThe Mochi Set from Paragon Tea Room comes with nearly all the ingredients you need to make 6 servings of mochi. The set includes:
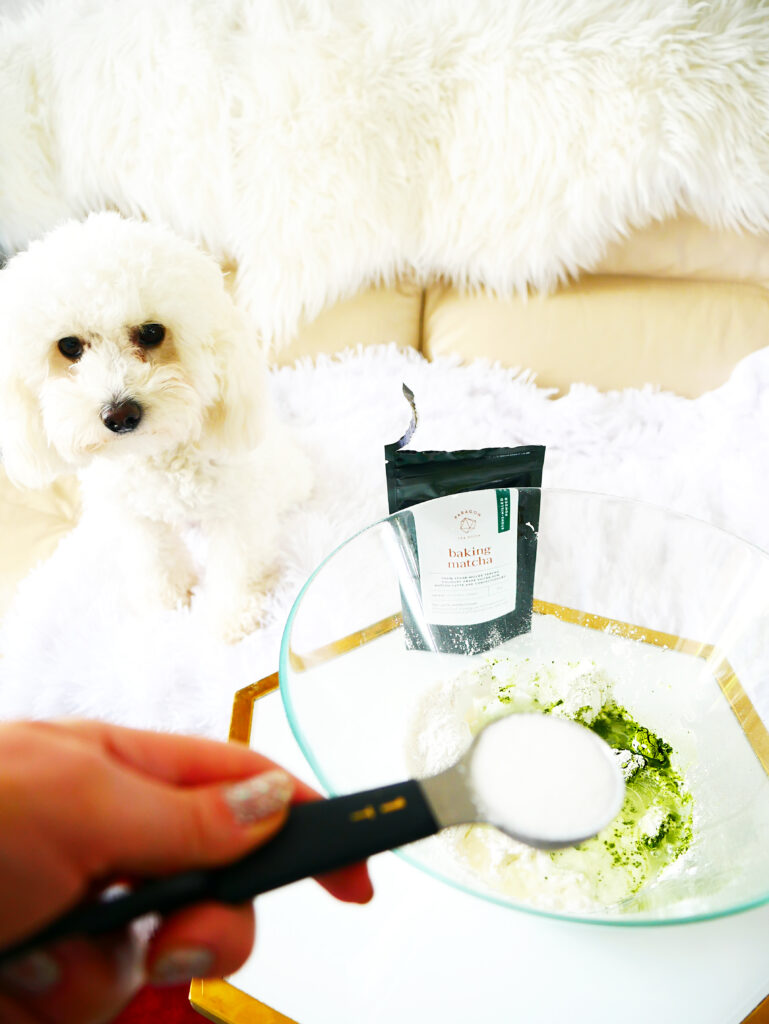
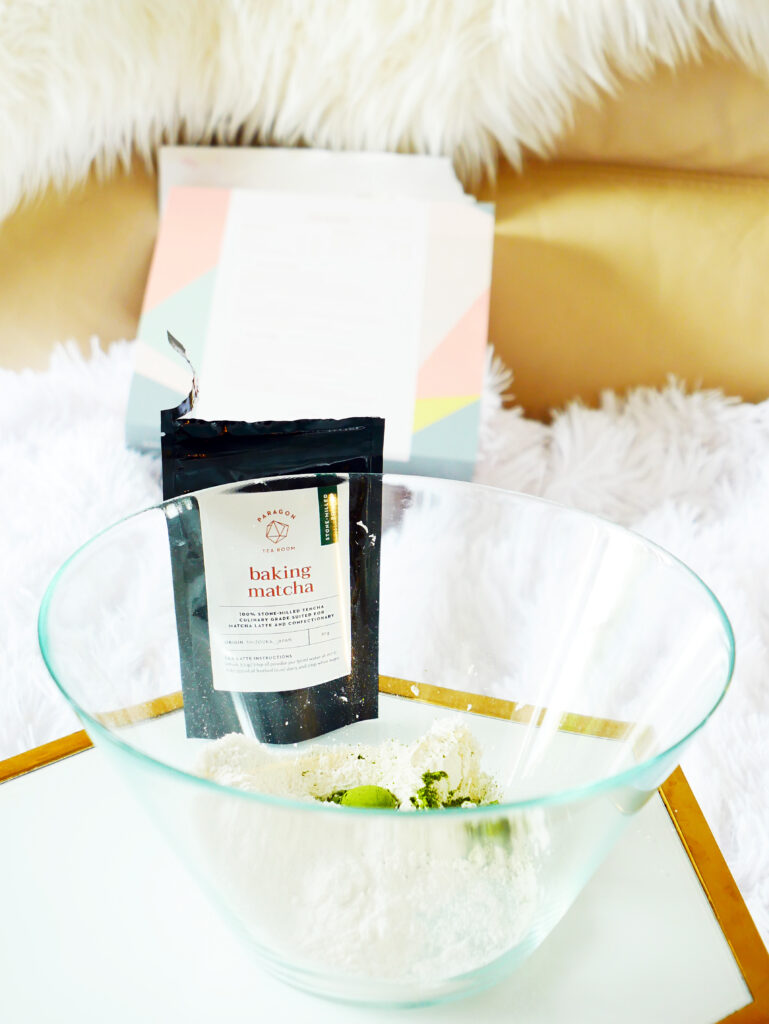
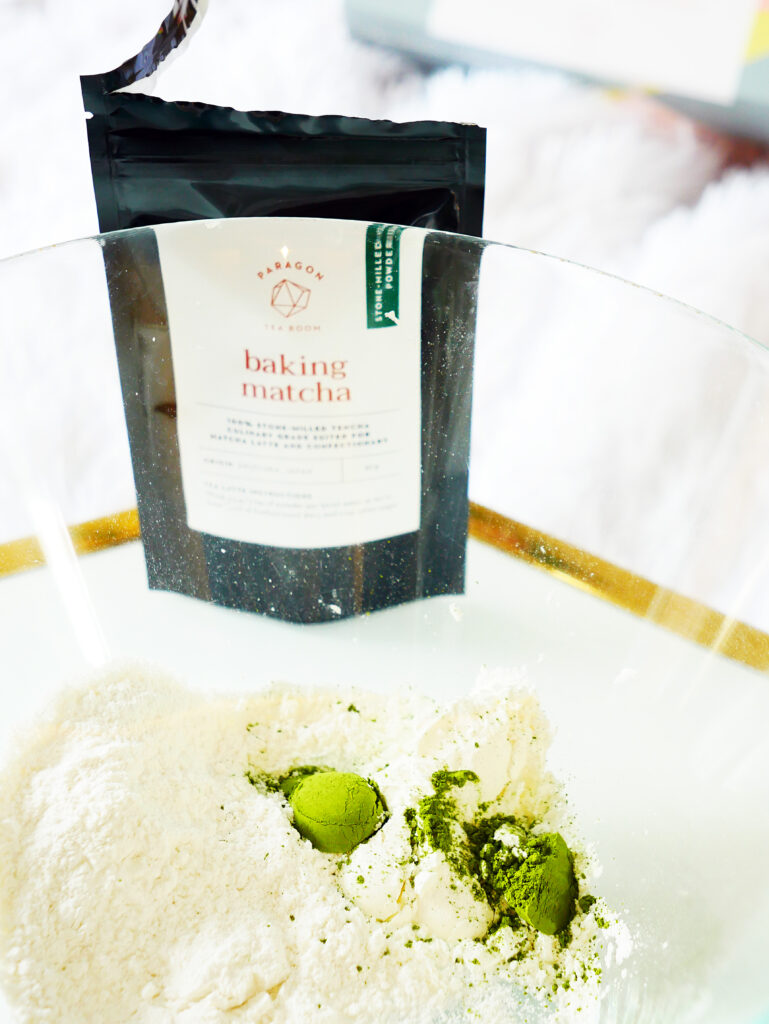
Three Types of Tea Powders:
- Paragon Tea Room‘s Baking Matcha
- Paragon Tea Room‘s Hojicha Powder
- Paragon Tea Room‘s Genmaicha Powder
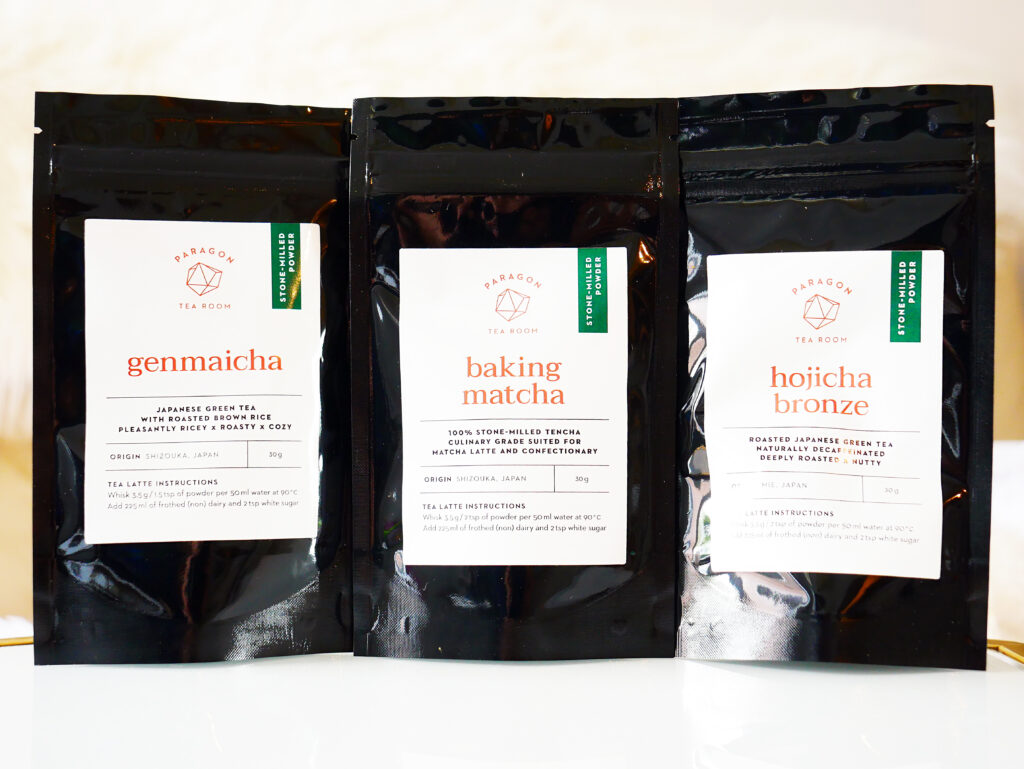
It also includes:
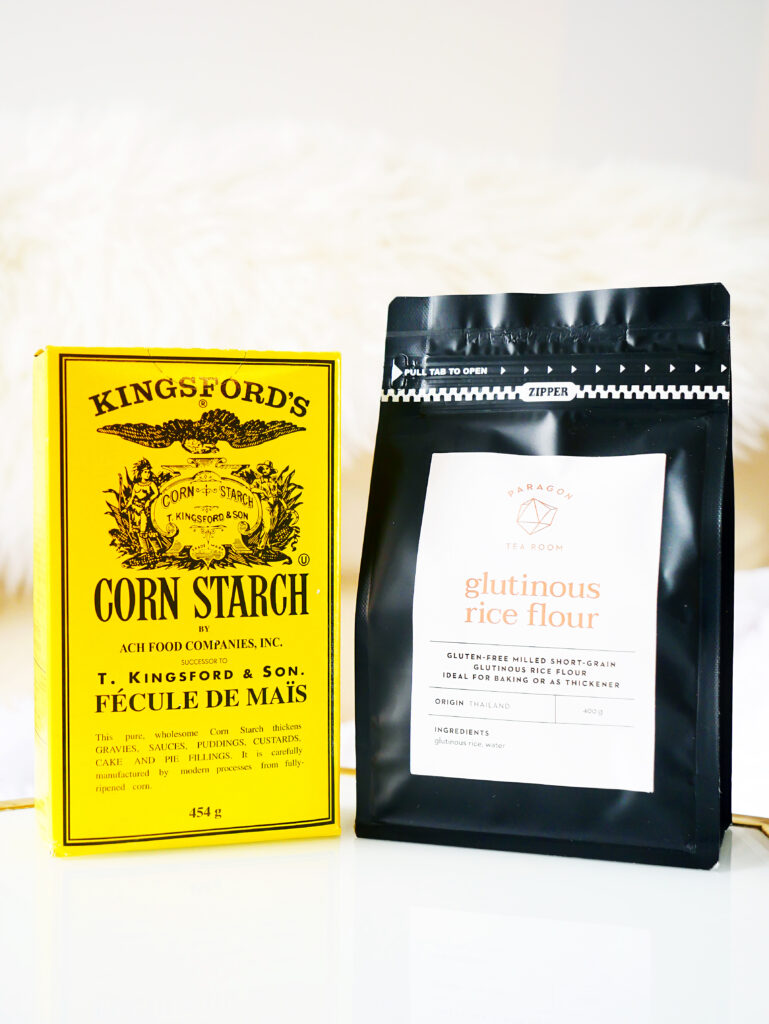
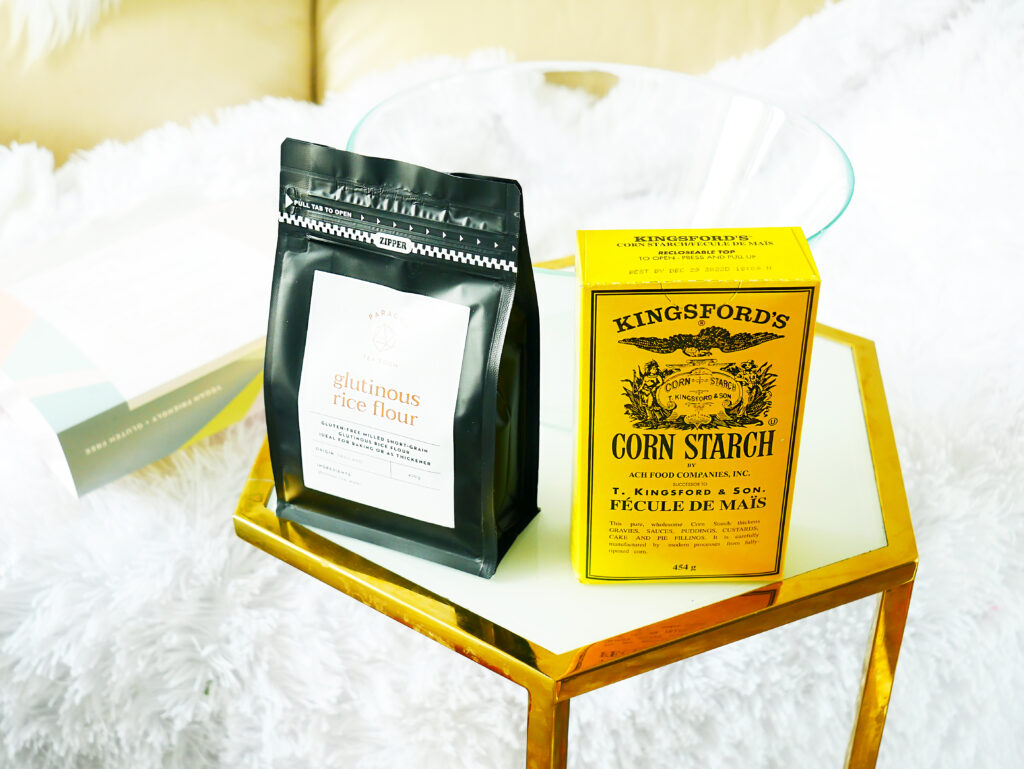
- Paragon Tea Room‘s Glutinous Rice Flour mix
- Kingsford’s Corn Starch
- Earth’s Own Oat “Mylk”
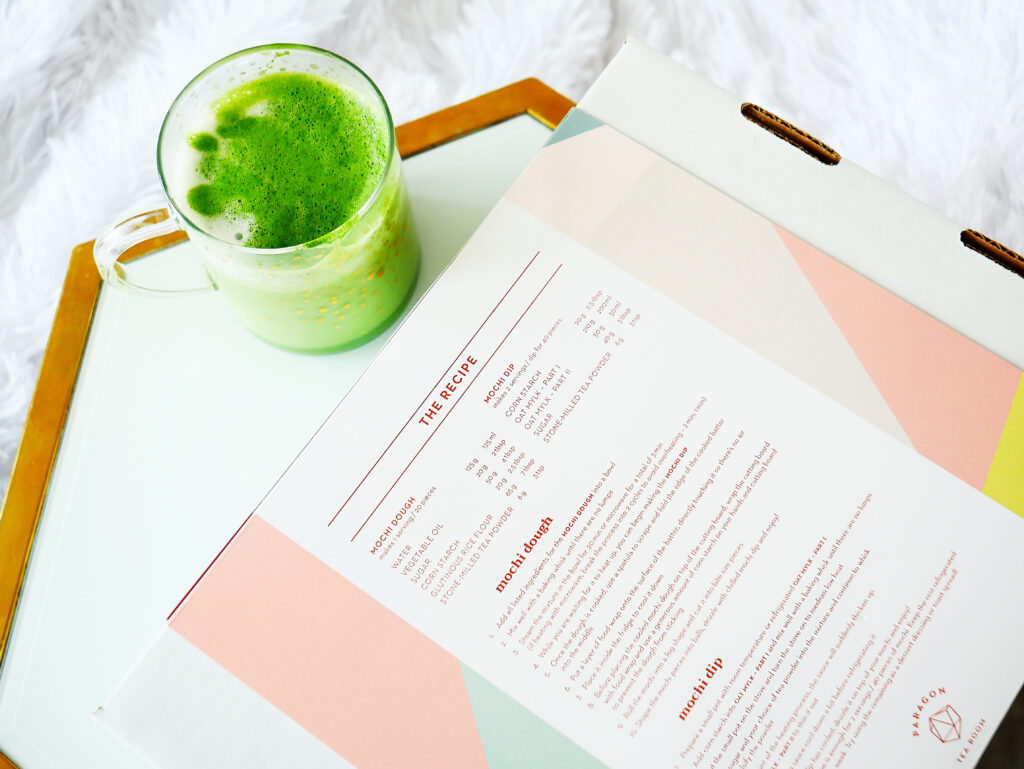
- Paragon Tea Room‘s mochi and mochi dip recipes
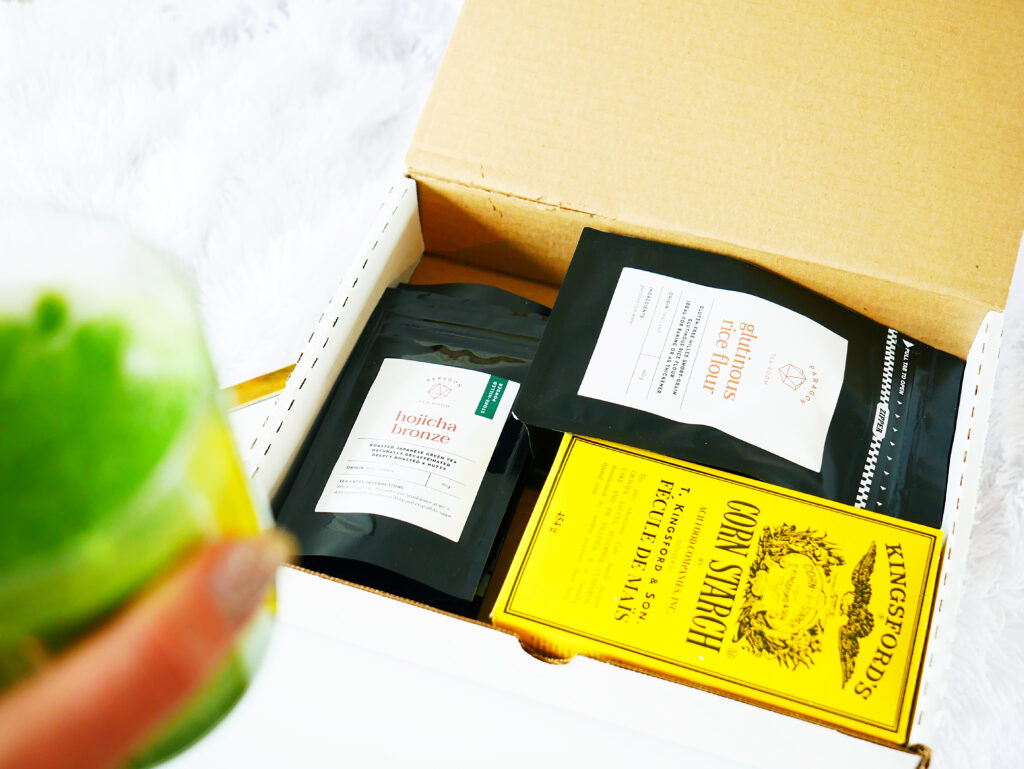
The set comes inside a rectangular box and is well packaged. Even Ella was curious about what was inside!
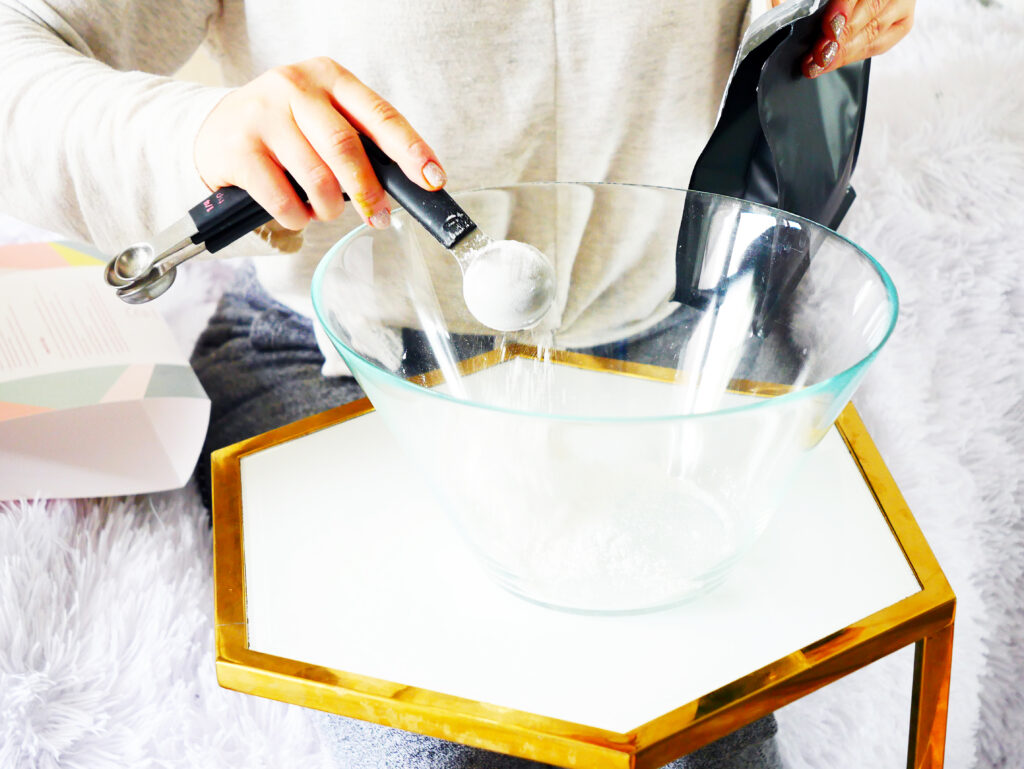
Following the Recipe |
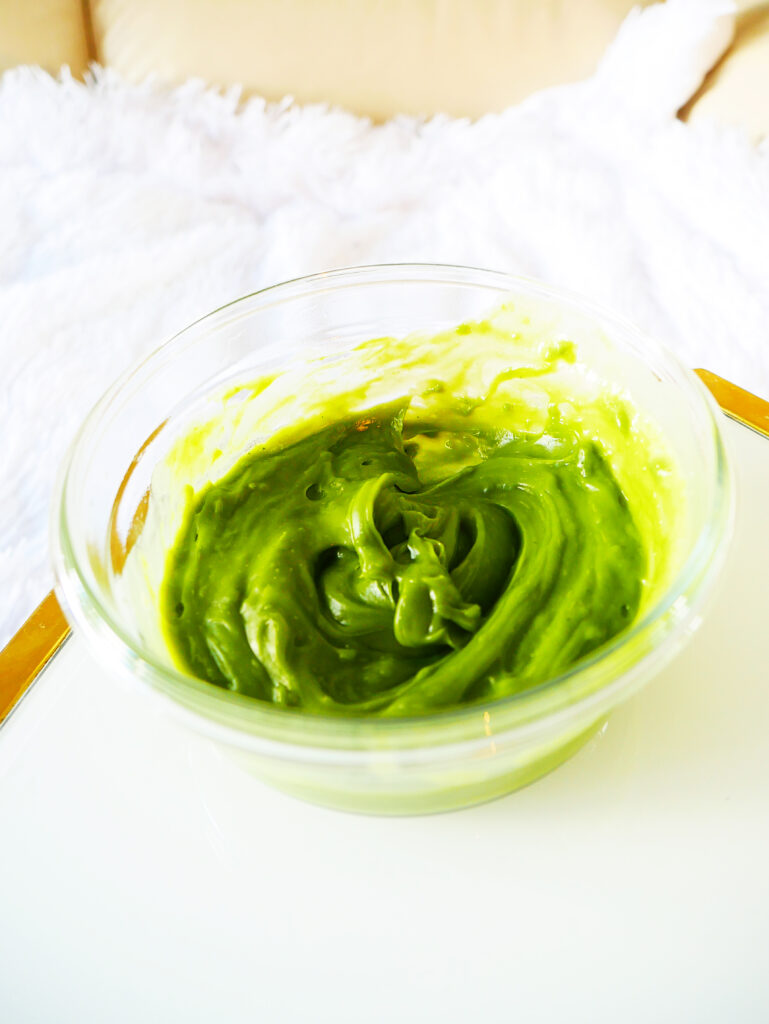
Matcha-Infused MochiAfter reading over the recipe, I decided to make a matcha-infused mochi and a matcha-infused dip.
I found both recipes straight forward and easy to follow.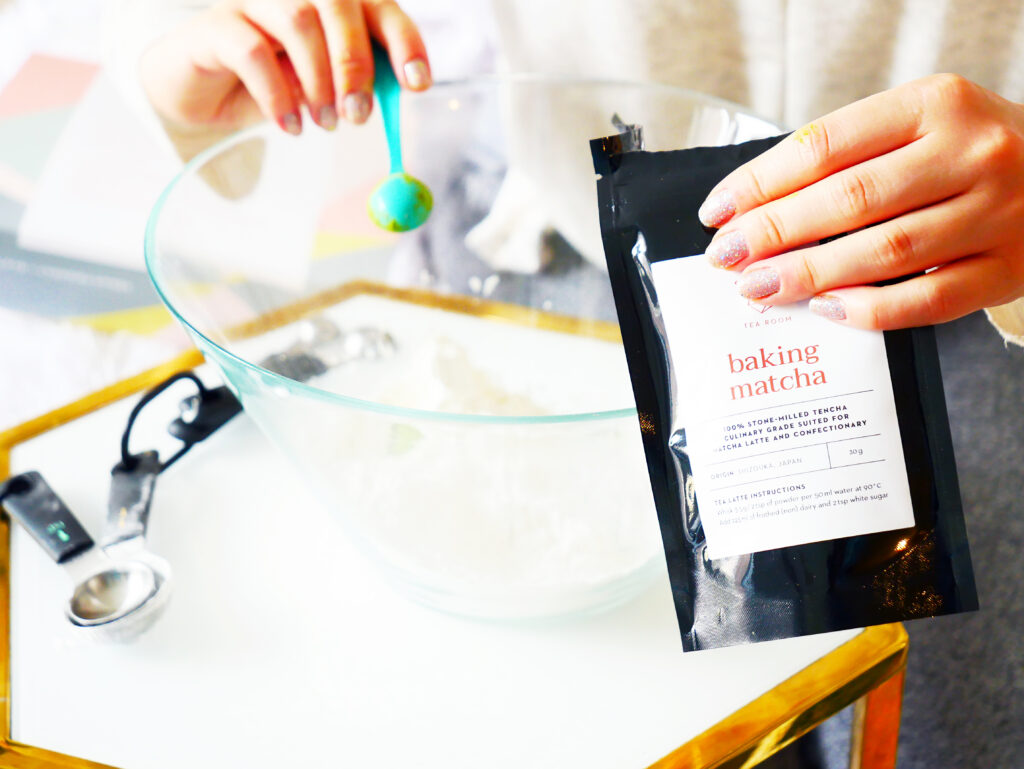
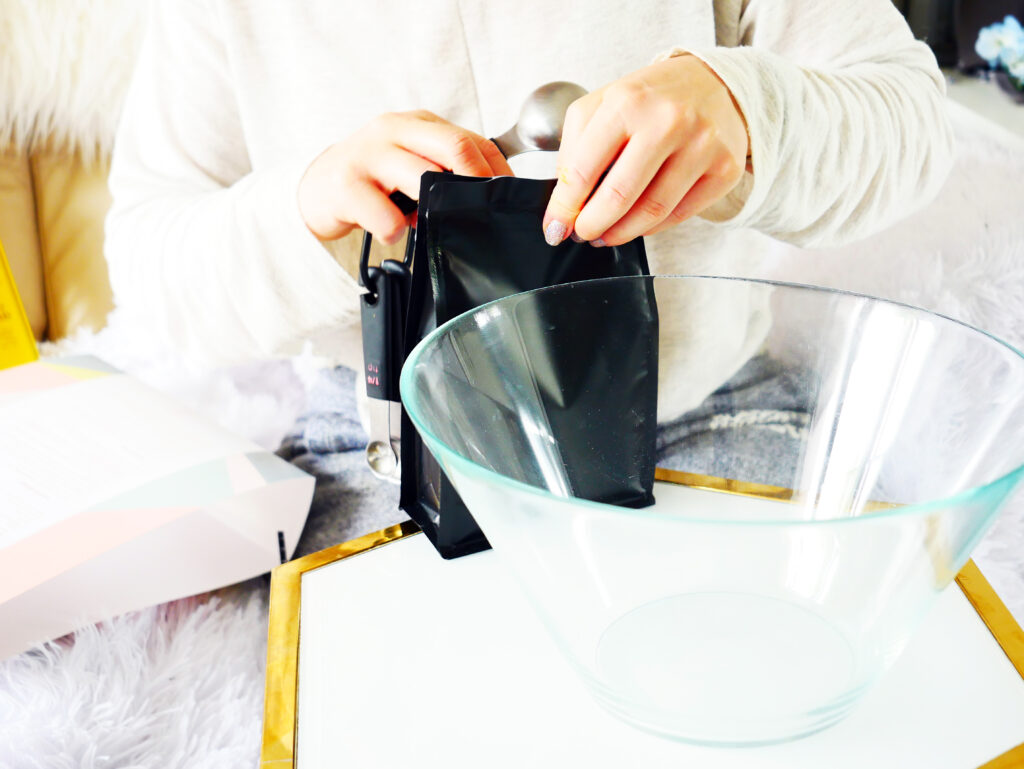
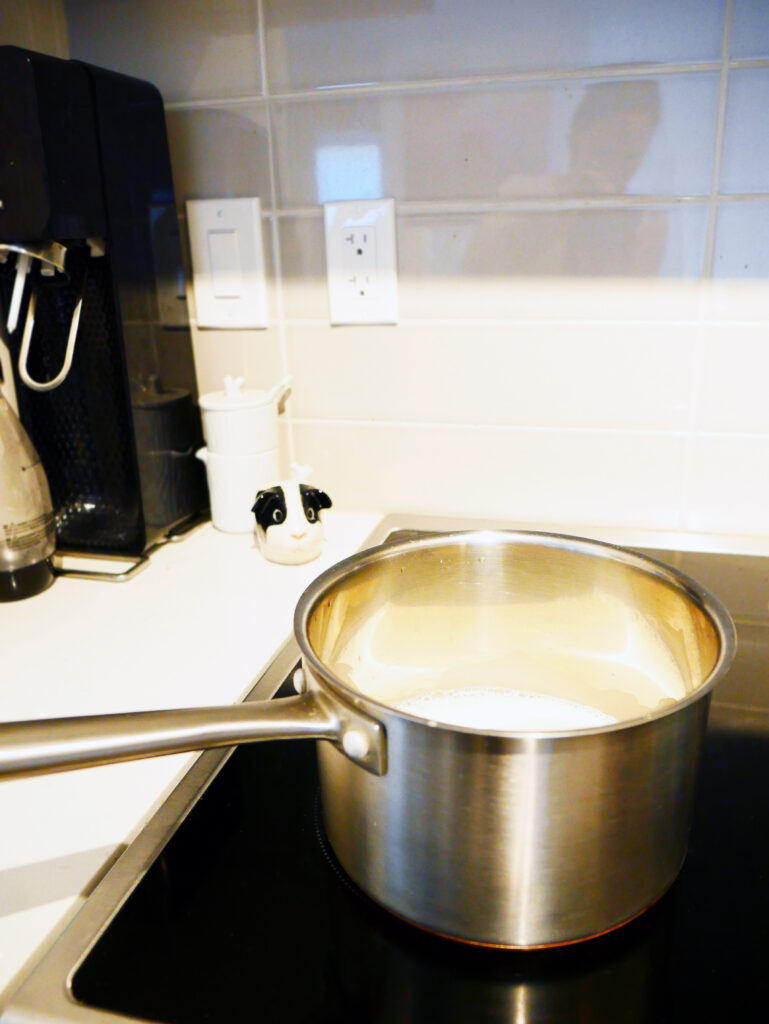
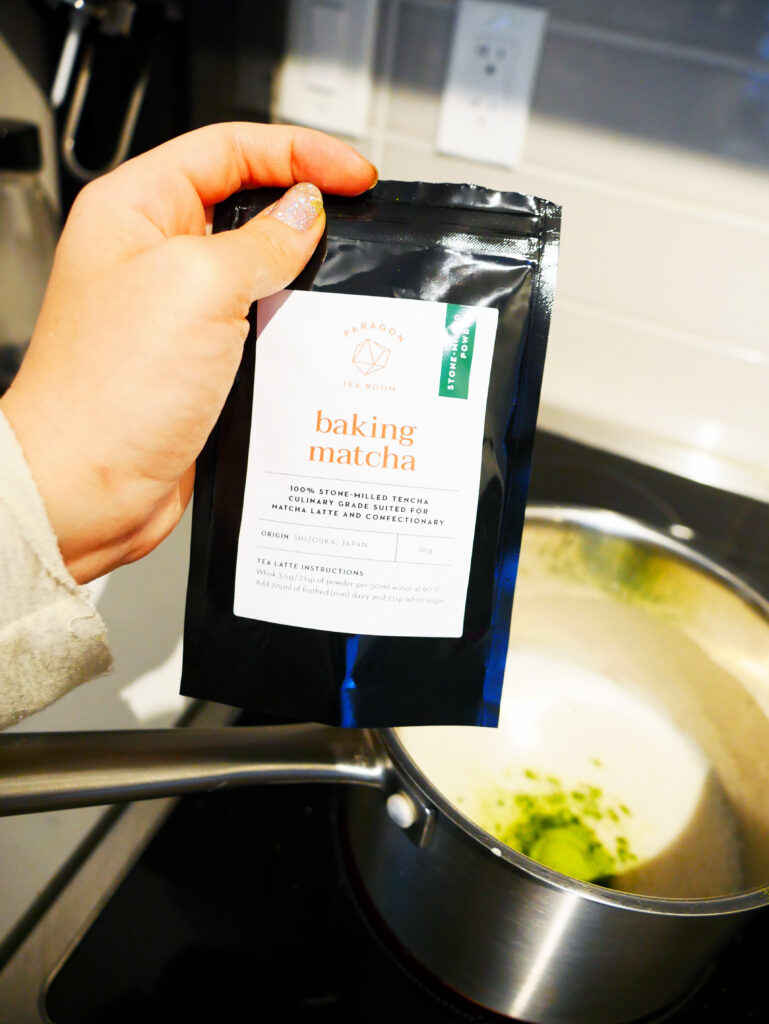
After adding and mixing in all the ingredients together, it was time to microwave the dough! This part I found a bit challenging, as I don’t own a microwave. Steaming was the next option, but I wasn’t sure the best way to go about it! I asked my dear friend Angie (from Over-the-Kitchen-Counter) to help me out! Even though she had not heard of mochi before, she gave me the best advice and tips! I used two pots and my stove to steam the mochi dough. It steamed perfectly! A special thank you to Angie! <3
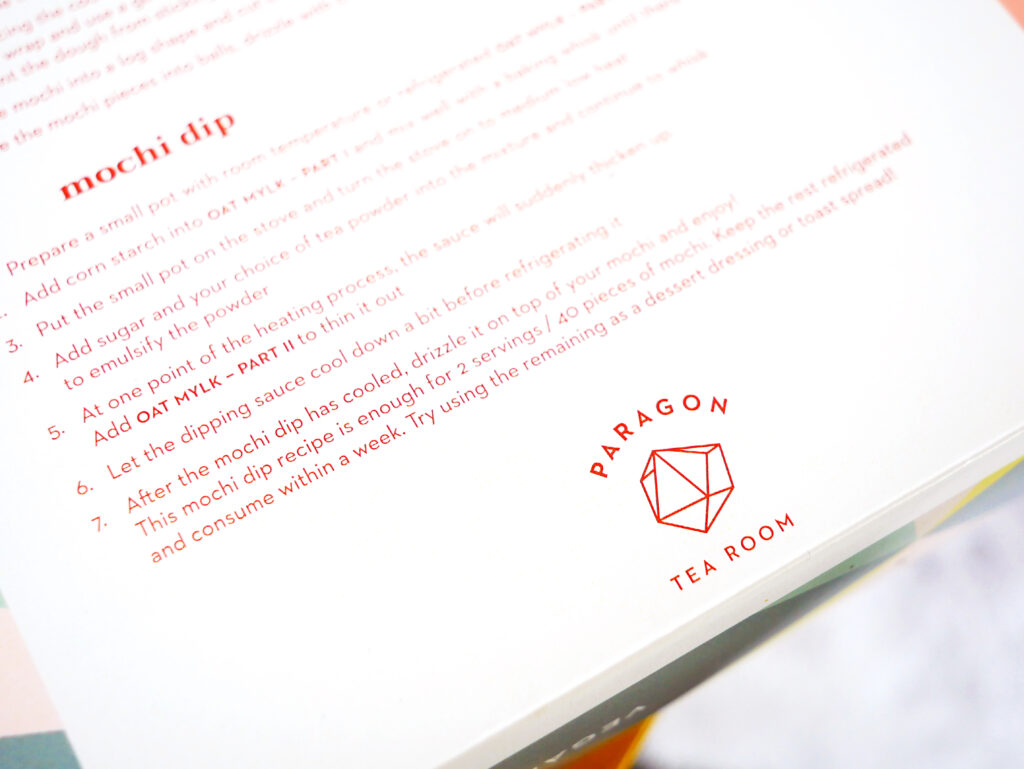
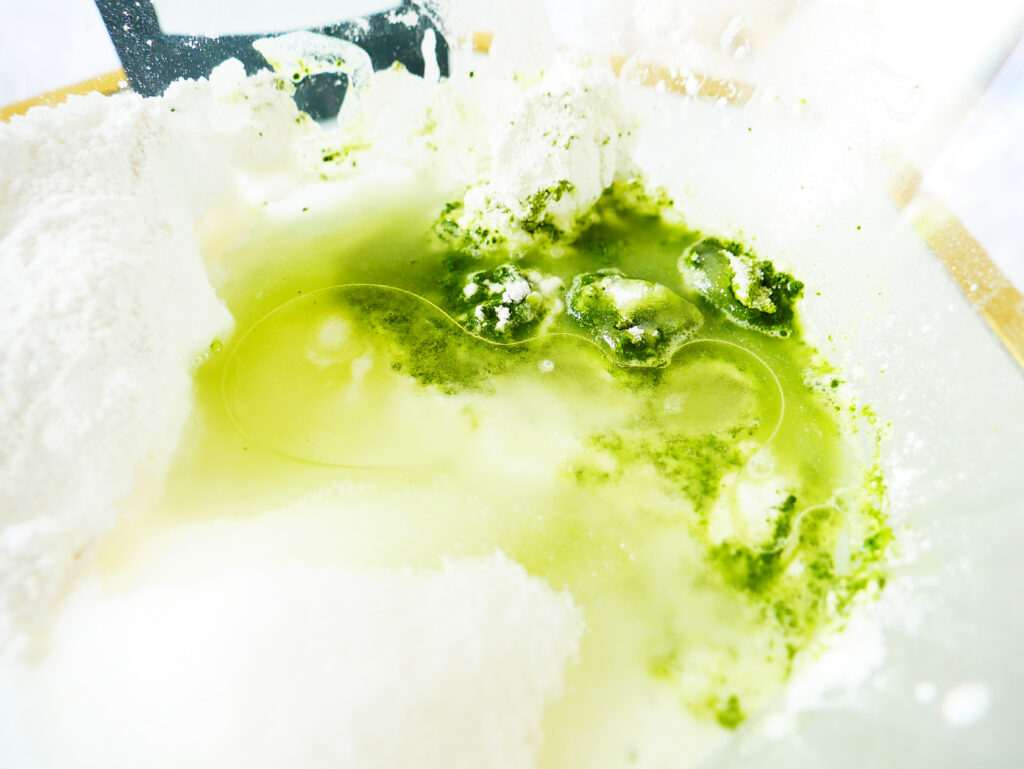
Making the Matcha Mochi Dip
While I waited for my mochi dough to cool, it was time to make the accompanying matcha-infused mochi dip:
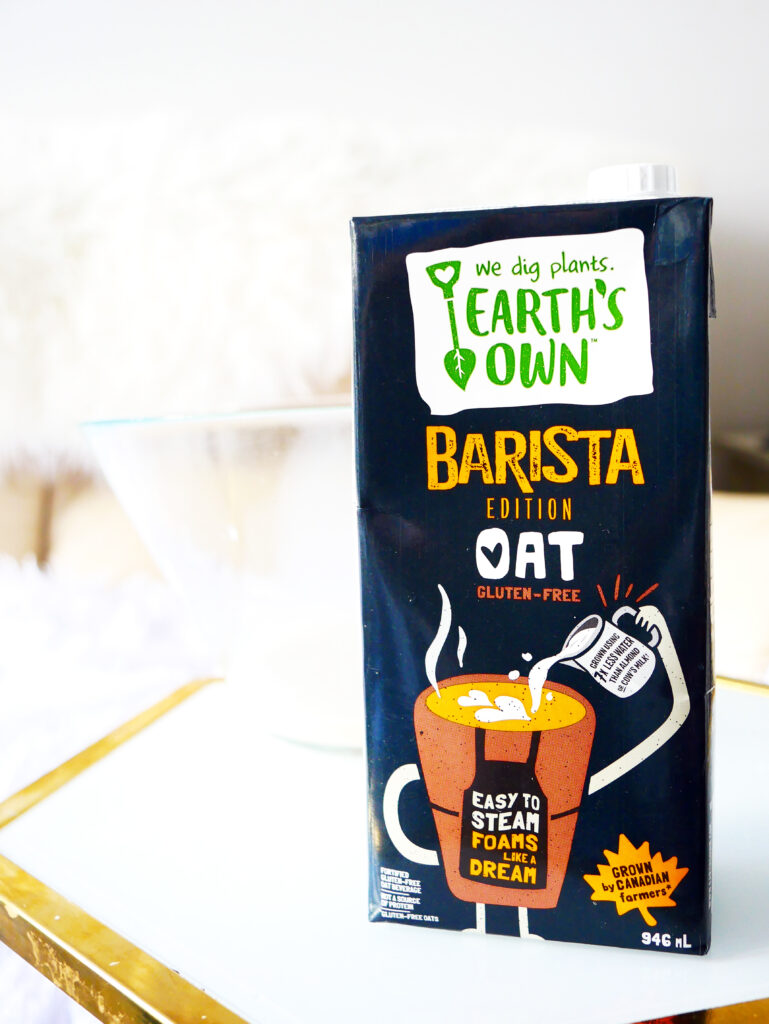
This was very fast and easy to make and I loved that I got to use Oat Mylk! I prepared the dip on my stove top.
The dip turned out fantastic! And I loved the cheerful green colour from the Paragon Tea Baking Matcha.
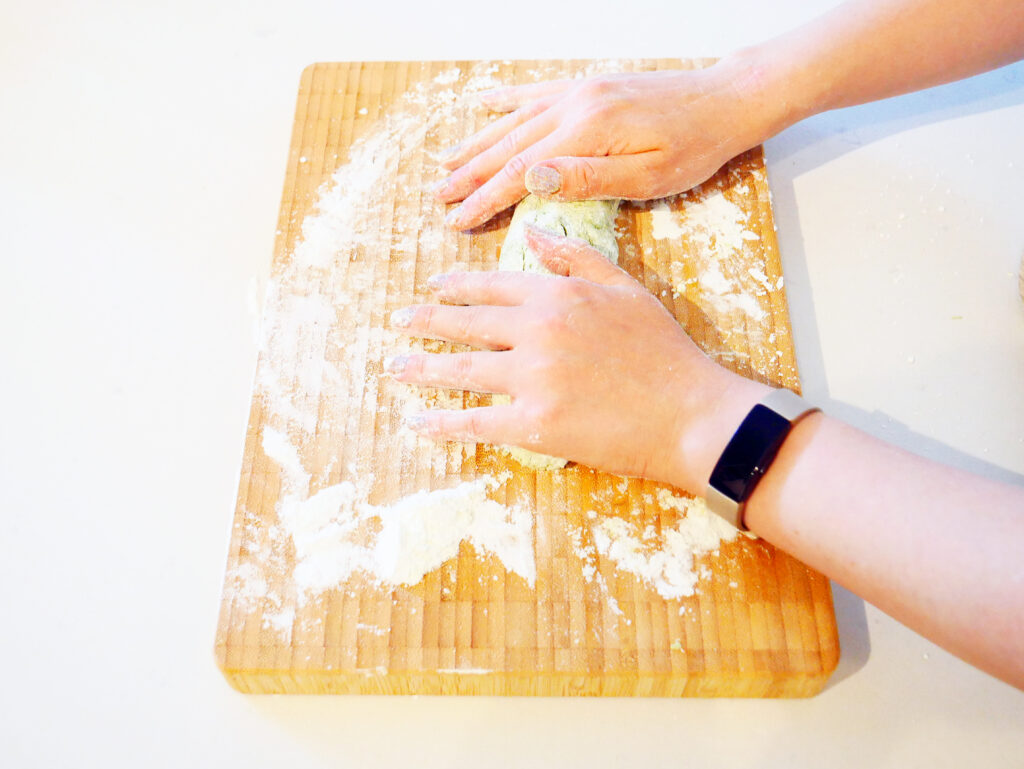
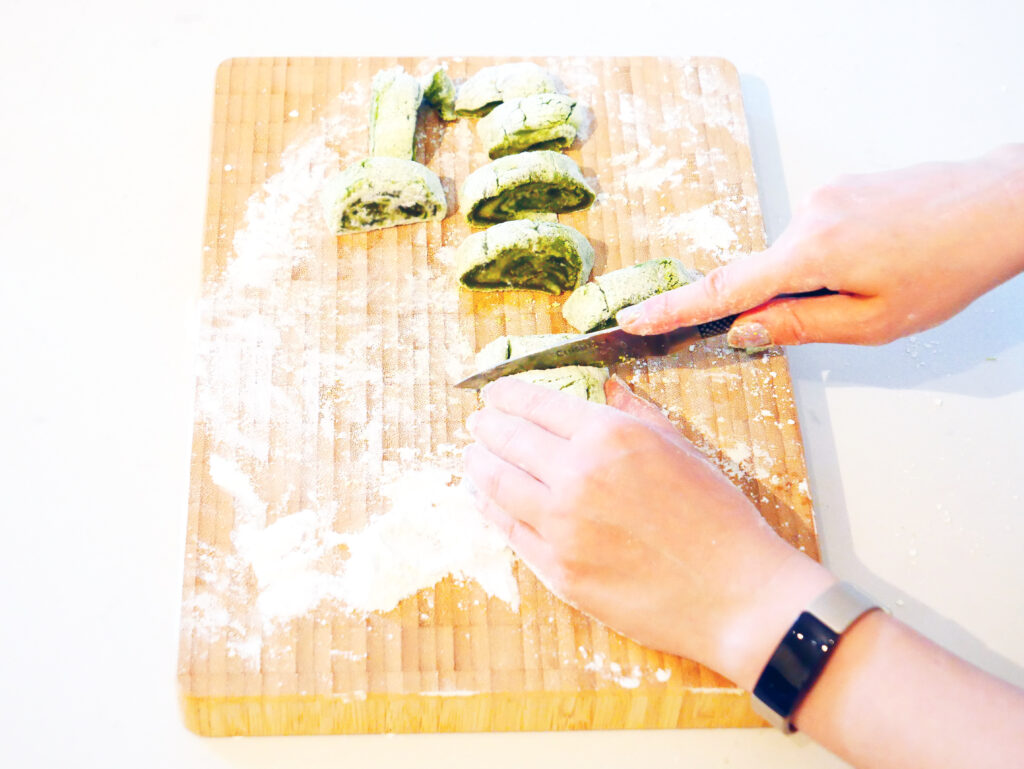
Roll it Out!
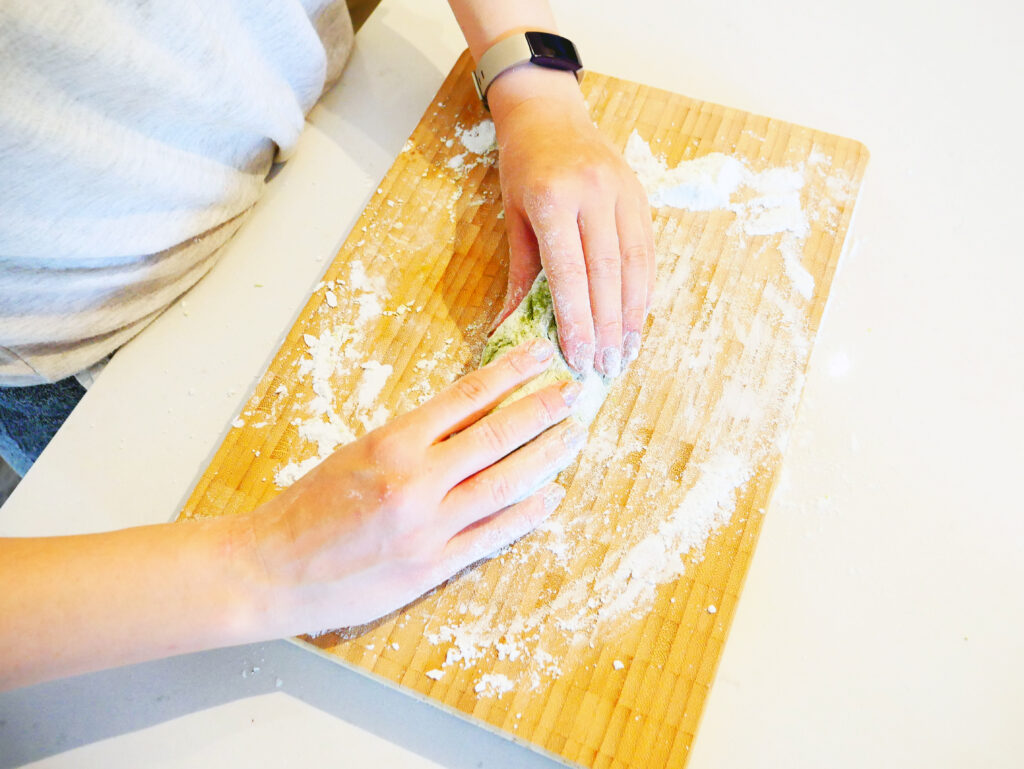
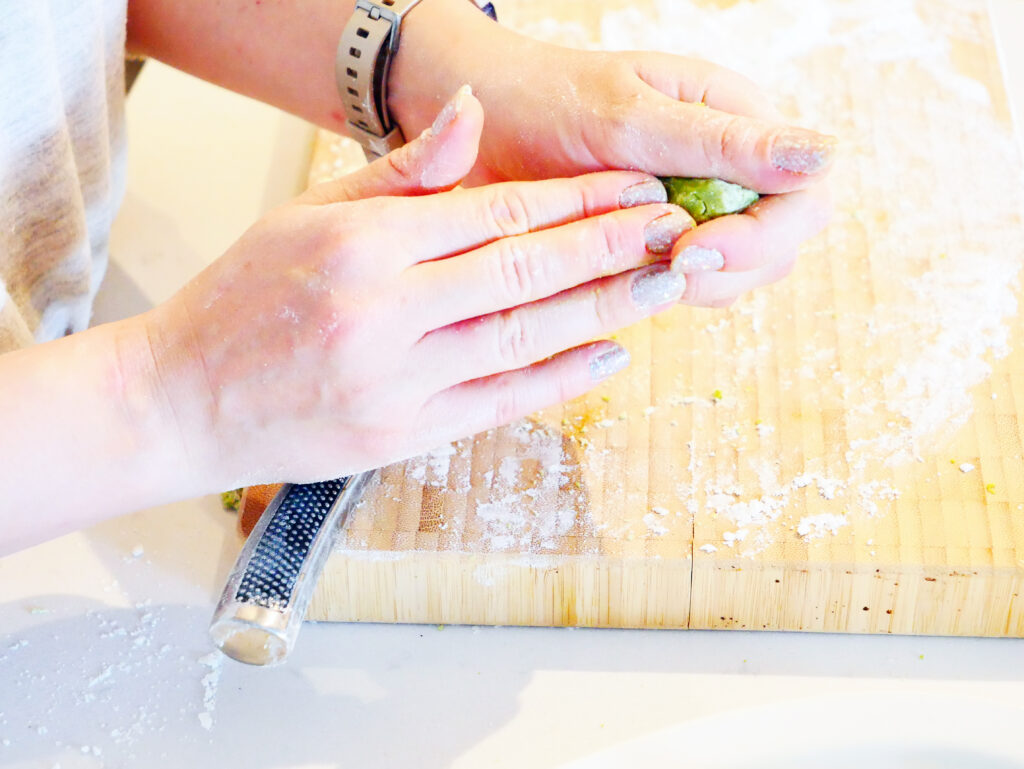
After my matcha-infused mochi dough had cooled off, it was time to roll it out and create individual pieces. I made my mochi into balls, but you can make them into squares too!
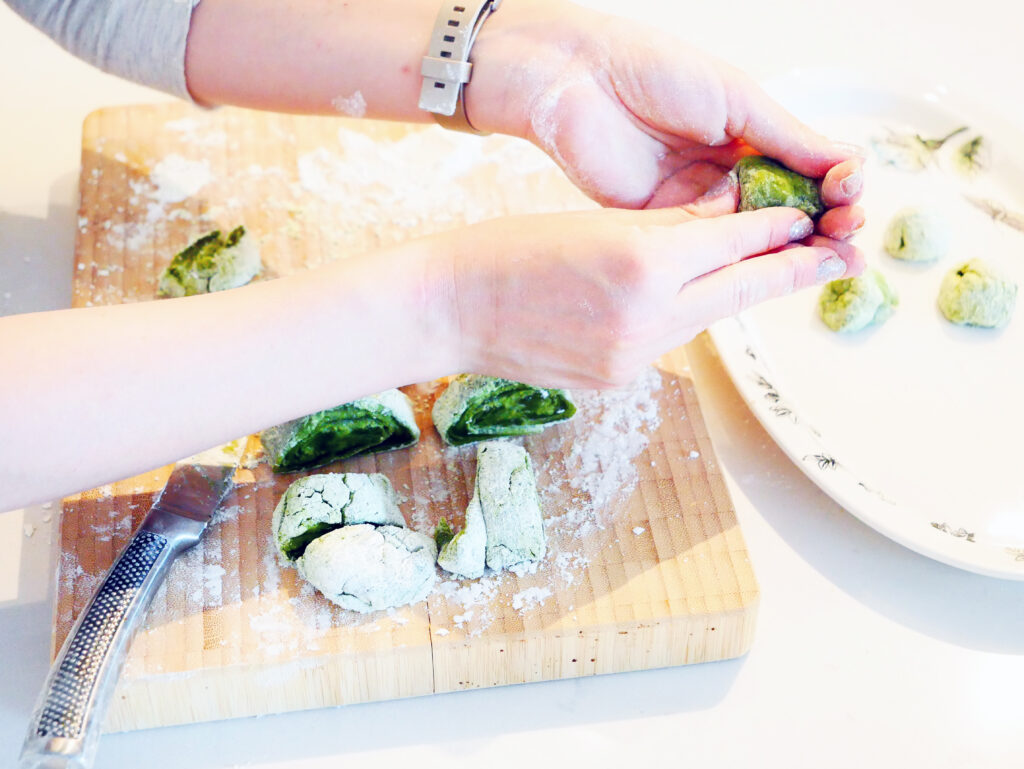
After the mochi balls were prepared, I decided to semi-stuff them with the dip. I also frosted the tops of them! I was so surprised at how well they turned out and how easy they were to make!
I would like to do a better job on how they look visually, but I think that will come with practice and time.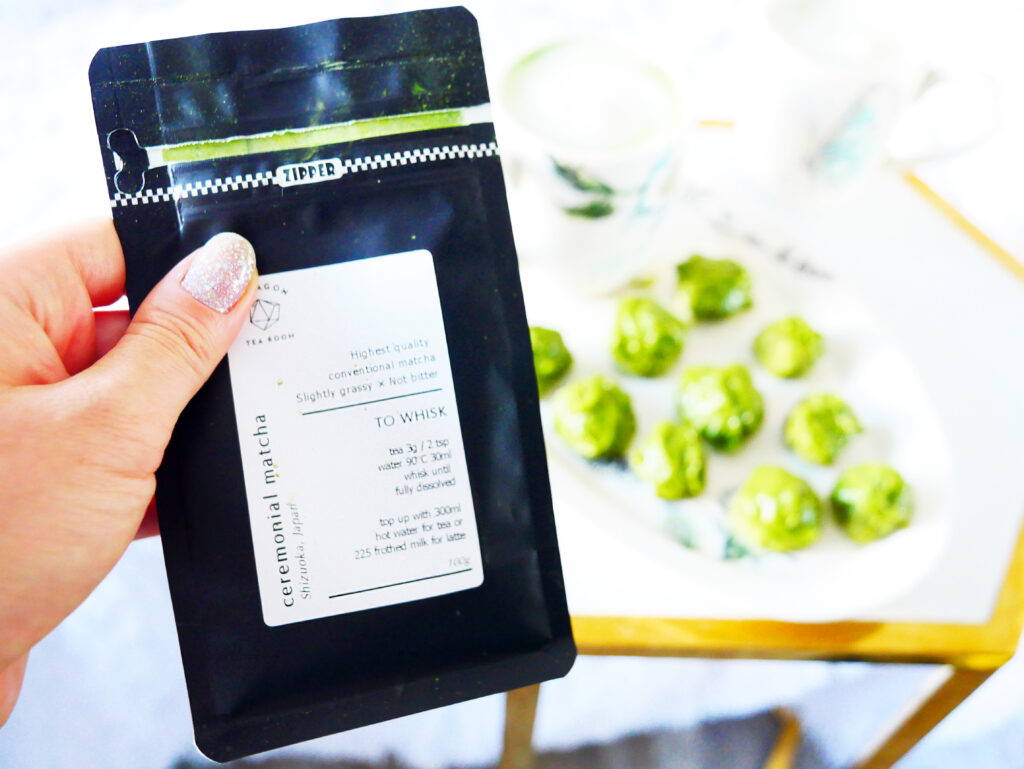
After I was done making the tea-infused mochi, I made two cups of Paragon Tea Ceremonial Matcha Lattes with Oat Mylk, for my husband and I. I thought they would pair nicely with the mochi. All the matcha flavours were happening that day! 😉

It was time to taste test these tea-infused mochi balls and see how well I did:
According to my husband, the matcha-infused mochi tasted amazing. He actually ate more than half of them, so I must have done something right!
I also loved my mochi too! They tasted so fresh and delicious. I also love that I now have the opportunity to make mochi 5 more times, from this wonderful set.
Have you ever made mochi at home before? If so, how did you find the experience? I am still surprised at how easy they were to make! I really found The Mochi set to be extremely helpful for a beginner.
The Mochi Set retails for $53.35 CAD, but is currently available for a launch price of $48.00 CAD. You can order it online (they ship to Canada and the USA) or pickup in-store, if you are local! You can find it HERE.
And that is it for today’s blog post! I hope you have a wonderful rest of your weekend and talk to you all soon! <3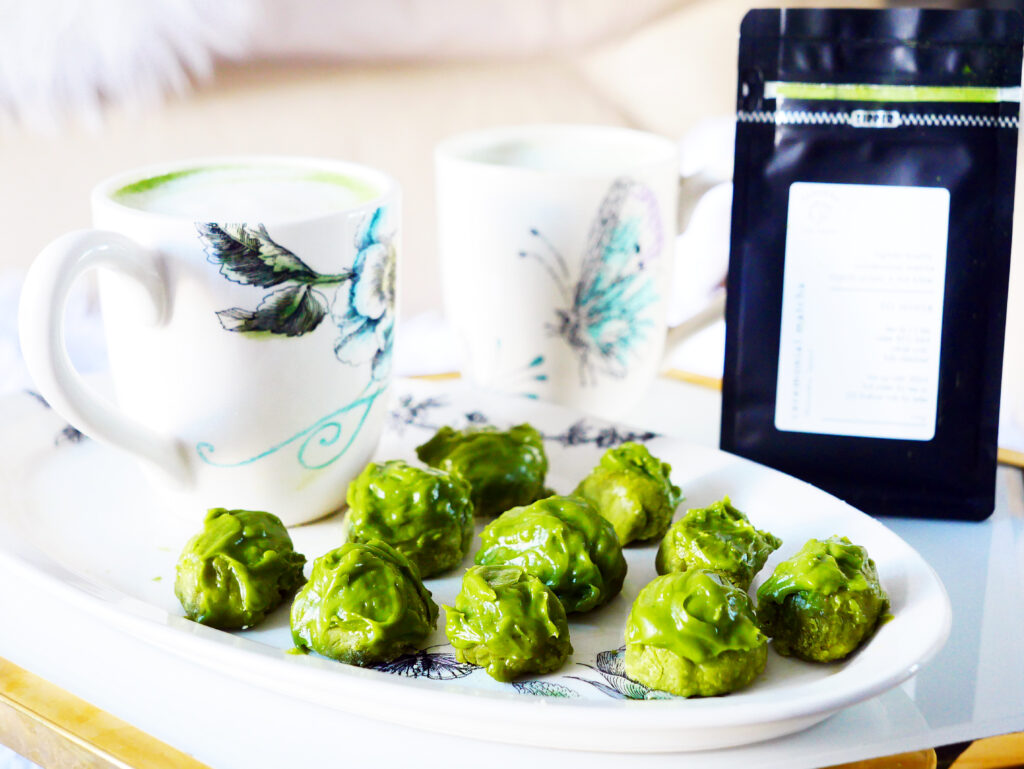
-
My Favourite Christmas Tea | Beadmas2019 Day 12 of #BeadmasStories

St. Nick is checking his list…twice! As the Christmas season rolls in, it is time for my favourite Christmas tea: Santa’s Secret from DAVIDsTEA*! Have you ever wondered how Santa is able to deliver all those toys, presents and cheer in one night? Well, here’s his secret (besides Christmas magic, of course)! A delicious Chinese black tea with peppermint, vanilla and magical candy cane sprinkles!

Santa’s best kept Secret!!! This tea is so delicious! I love having it black, but it also makes a delicious tea latte! There’s two ways I love to make it as a latte:
Latte Recipe One:
1. 3-4 perfect spoonfuls of Santa’s Secret
2. Fill your Steeper with about 235ml of water (roughly right above the DAVIDsTEA logo)
3. Feel free to add your choice of sweetener to the steeper (honey, agave, etc.) as the tea steeps. Roughly, 1tbs. Lightly stir in.
4. Steep for 4-6 minutes, depending on taste level.
5. Dispense tea into your favourite Christmas mug.
6. Froth about 235ml of your choice of: Almond Milk, Soy Milk or Milk. I have a video about how I froth my almond milk, HERE.
7. Pour your frothed milk over your Santa’s Secret Tea..and VOILA! Your Santa’s Secret Latte is ready to be enjoyed!
Latte Recipe Two:
1. 3-4 perfect spoonfuls of Santa’s Secret
2. Fill your Steeper with about 235ml of water (roughly right above the DAVIDsTEA logo)
3. Feel free to add your choice of sweetener to the steeper (honey, agave, etc.) as the tea steeps. Roughly, 1tbs. Lightly stir in.
4. I also add a tiny bit of vanilla extract, just a drop!
5. Steep for 4-6 minutes, depending on taste level.
6. Dispense tea into your favourite Christmas mug.
7. Froth about 235ml of Peppermint Chocolate Almond Milk. I have a video about how I froth my almond milk, HERE.
8. Pour your frothed Peppermint Chocolate Almond milk over your Santa’s Secret Tea. Please note, the chocolate almond milk will not froth as much as normal almond milk…but this tastes like a peppermint hot chocolate and is sooo sooo delicious!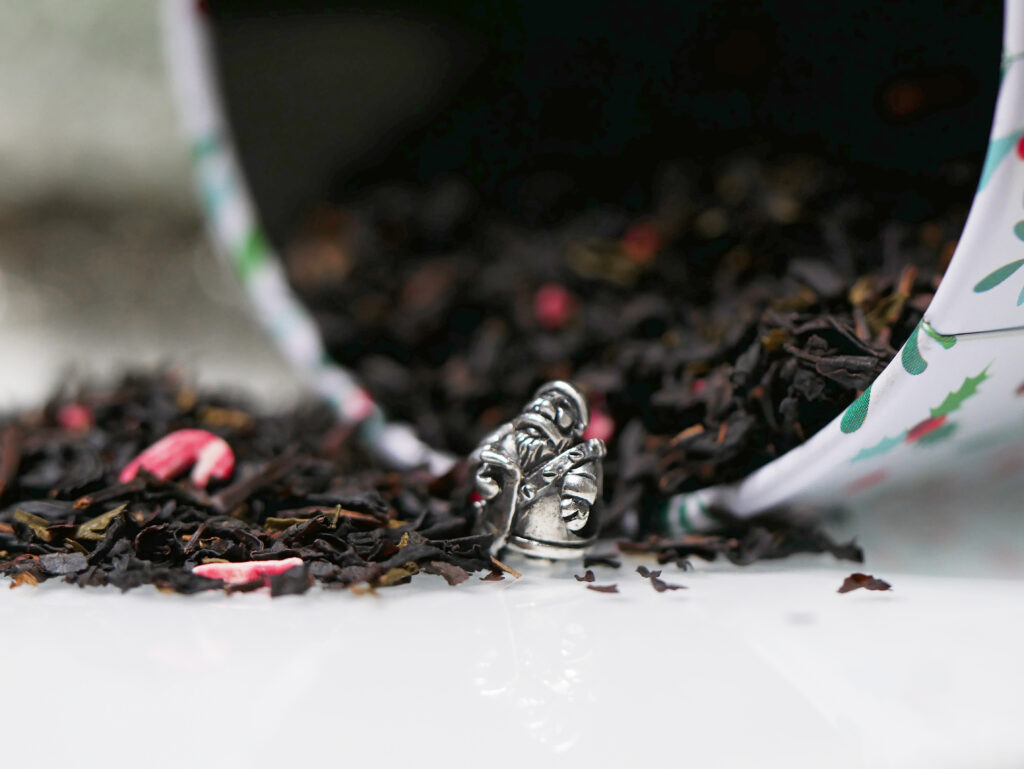
HO HO HO! Now, as you know, today is the last day of Beadmas 2019 | #BeadmasStories. As for today’s giveaway, Ohm Beads and I are teaming away to give one lucky winner the Ohm St. Nick bead! This is a very special bead to me because he represents my chosen Saint Name. As a Catholic, I got confirmed into my faith when I was in grade 8. I remembering researching so many different saints, but the one that stood out to me the most, was my hero since I was a little girl: Saint Nicholas. He was so inspiring to me…and the fact that his memory lives on through one of the most magical and holy seasons was very special to me! Now, pretty much every single person made “fun of me” for picking a “boy’s name” as my Saint. But I didn’t care…it wasn’t about what people thought of me! And…my Confirmation Sponsor (unknown to me, at the time) had chosen St. Valentine as her saint!
To find out how to win this bead, head over to my Instagram, @fashionstoryteller and look for one of those photos used in this blog post!
Merry Christmas and Happy Holidays!!! xx
Emily D.
*P.S: some of the links, in this blog post are affiliate links.
St. Nick by Ohm Beads